


Product Description
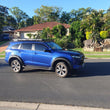
Compatible Mu-X models 2021-2024.
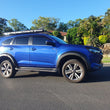
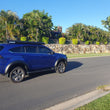
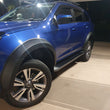
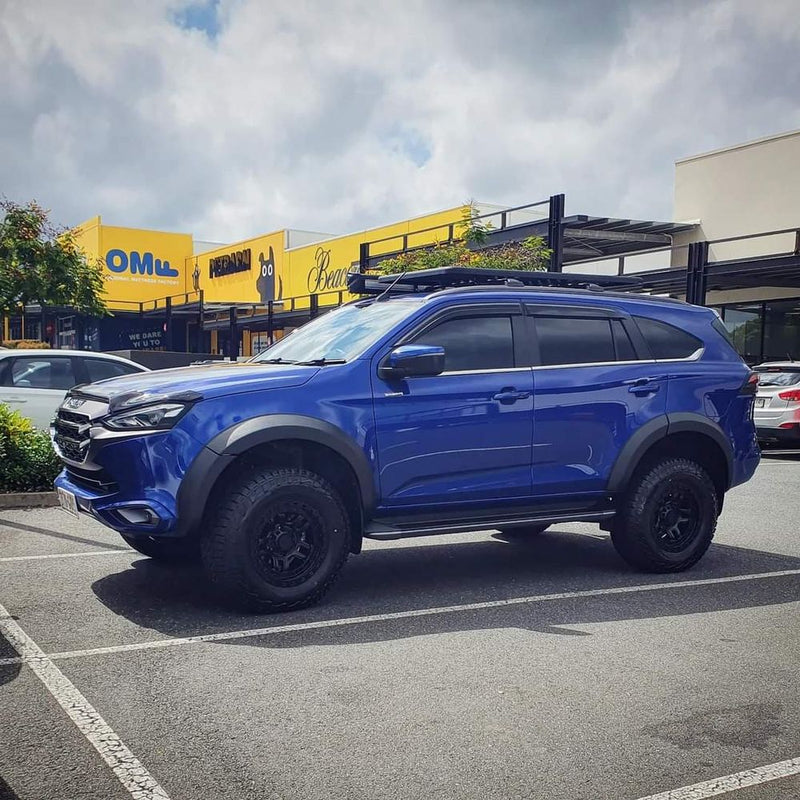
Elevate your vehicle's style and protection with our Custom Fit Flare Kit, meticulously designed to enhance both aesthetics and functionality. Here's why our flares are the ultimate solution for your automotive needs:
Perfect Fitment: Crafted specifically for the
2021-2024 model Isuzu Mu-X,
(Not compatible with 25 face lift models)
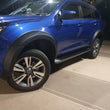
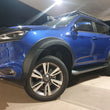
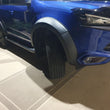
Our flares seamlessly integrate with your vehicle's body lines for a sleek OEM-style appearance. Each flare is meticulously 3D scanned to ensure precise fitment, providing maximum coverage and protection.
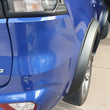
Enhanced Protection: With a maximum extra poke coverage of 40mm, our flares safeguard your painted guards from debris thrown up by wider tires, reducing the risk of damage and preserving your vehicle's exterior. Additionally, they help deter unwanted attention from law enforcement agencies.
Premium Construction: Constructed from durable ABS plastic, our flares offer exceptional strength, durability, and UV stability, ensuring long-lasting performance and resistance to harsh environmental conditions. The matte black finish complements any vehicle color and allows for easy customisation if desired.
Easy Installation: Our flares are designed for hassle-free installation, with each piece labeled and numbered for quick identification. Simply follow our step-by-step installation guide, which includes detailed instructions and reference points for precise placement. No modifications to the cross member are required.
Comprehensive Kit: Our kit includes all necessary hardware and components for installation, ensuring a seamless and secure fit. Each flare is meticulously engineered to meet our stringent quality standards, guaranteeing reliability and performance.
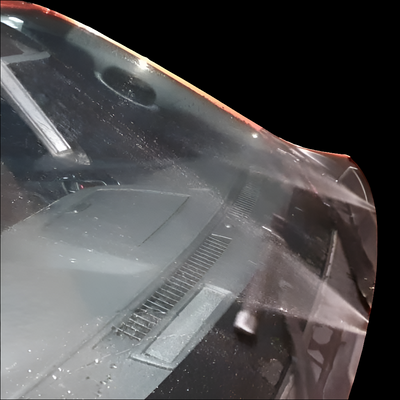
Optimal Preparation: Before installation, ensure your vehicle is thoroughly washed and free of dust, debris, and contamination. Proper surface preparation is essential for achieving a strong and durable bond between the flares and the vehicle's body panels.
Additional Tips: We recommend applying pressure along the adhesive tape edges for the first 2 days after installation to ensure optimal bond strength. Avoid exposure to rain and moisture for the first 24 hours to allow the adhesive to fully cure.
Upgrade your vehicle's appearance and protection with our Custom Fit Flare Kit, designed to meet the highest standards of quality, performance, and durability. Experience peace of mind knowing your vehicle is equipped with premium-grade flares that offer both style and functionality.
Here's a detailed guide for installing your Custom Fit Flare Kit:
Pre-Installation Preparation:
Before beginning the installation process, it's essential to ensure optimal surface preparation for effective adhesive bonding. For best practices, please refer to this link: Surface Preparation Guide
Installation Steps:
Step 1: Lay out all the flares in sequential order, from front to back, and separate them into left and right sides.
Step 2: Start with the front flare, either R2 or L2, and remove the Front Mud Flap using a 10mm socket and ratchet spanner or a Philips head stubby screwdriver.
- Mount the flare into position using the mud flap bolts, ensuring alignment with the bumper line.
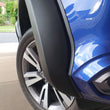
Note before next step: It's crucial to ensure proper alignment of the adhesive strip when installing the flares. Take note that the top section with the adhesive strip should lean on the panel without any gap. When viewing the flare from the front, you should observe that the top half of the flare makes contact with the panel, while the bottom half has a cavity and does not touch the guard.
Avoid pushing the bottom of the flare too close to the panel, as this can create a seesaw effect, pulling the adhesive top section away from the guard. This misalignment can prevent the adhesive from bonding correctly to the guard, compromising the effectiveness of the installation.
It's essential to follow this procedure meticulously for all flare placements to ensure a secure and durable installation.
- Once in the correct position, mark the hole in the wheel arch with a permanent marker, drill a 4mm hole, and fit one of the gold threaded screw plates.
- Remove the flare and mudflap screws, peel a small section of the backing tape (approx. 3cm) from the adhesive strip on each end and fold it for easy access.
- Mount the flare back into position (with the mudflap going back on), aligning the hole with the clip just fitted. Add the screw with the flat washer loosely. Apply pressure along the tape edge using a soft cloth, then tighten the screw in the clip.
Step 3: Hold the front R1 + L1 flare into position, lining up the lines of the previous flare just fitted and the lower section where there is a V shape around the bumper lines near lights.
- Mark the holes to be drilled and remove the flare to drill the clearance holes for the clips.
- Mount the flare loosely into position with screws and flat washers into the clips, ensuring proper alignment.
- Remove backing tape and apply pressure firmly along the adhesive edges.
(R1 + L1 can be skipped if you have a bullbar that doesn't require the bumper flare piece)
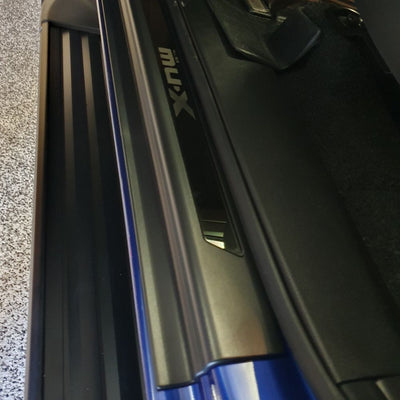
Step 4: Add the smallest sections of flare onto the door sill (R3 + L3).
- Place into position with the door closed and mark the hole to drill a clearance hole.
- Follow the application procedure, mounting loosely, checking position, and applying pressure to tape mount face.
- Secure with screws and washers or additional clips if needed.
(Note: You can remove the wheel for best drilling practice, or you can just drill this hole on an angle. You can decide what's best for you).
Step 5: Secure R5 or L5 into position with the mudflap screws, ensuring proper alignment.
- Begin by removing the rear mudflap using either a 10mm socket or a Philips head screwdriver.
- Next, position either the R5 or L5 flare into place, using the mudflap screws to secure it. Ensure that the front face of the flare aligns with the body line on the door frame.
- Confirm that the top edge of the flares rests smoothly on the guard without any gaps. At the front of the flare, there should be a gap from the guard on the lower half to prevent a "see-saw" effect.
- Once alignment is correct, mark the location for additional screws. Drill these marked holes to accommodate screws and flat washers. If the section is too wide for a clip, consider adding a second hole closer to the end where a clip can fit. You have the option to add more screws as needed, as the kit includes plenty of extras.
- After drilling, follow the application procedure again. Remove the backing tape from the ends of the flare.
- Before completely removing the tape backing, position the flare in accordance with reference lines. Then, fit the mudflap and secure it tightly.
- Once the flare is snug against the guard with no gap on the adhesive edge, remove the remaining backing tape.
- Apply pressure along the adhesive edges and secure all screws that were added.
Step 6: Fit the flare sections to the doors (R4 + L4) using adhesive tape.
- Test mount into position first, ensuring alignment with other flare sections.
- Remove backing tape and apply pressure along the taped edges.
Post-Installation: Run over the adhesive taped edges with a soft cloth and apply pressure for the next 2 days to ensure optimal bond and adhesion. Avoid rain and moisture for the first 24 hours.
With these detailed installation instructions, you'll be able to effortlessly install your custom fit flare kit and enjoy enhanced protection and style for your vehicle.
Shipping Policy
Orders are processed within 1-2 business days and typically delivered within 3-7 business days. For more information, please visit our Shipping Policy page.
Returns Policy
We accept returns within 30 days of purchase. Products must be unused and in original packaging. For detailed return instructions, please visit our Returns Policy page.
You may also like

Exclusive Wholesale Pricing
Unlock tiered pricing, volume discounts, and bulk order incentives built specifically for auto professionals.

Safe & Secure Payment
All transactions are protected with advanced encryption and secure gateways. Shop worry-free with trusted payment methods.

Custom Orders & Bundles
Request custom kits or bulk packages tailored to your shop's needs and seasonal trends.

100% Genuine Products
We supply only OEM and high-quality aftermarket parts you can trust — no compromises on quality or performance.